MapBoards Description
This doumentation is based on the latest version. Updates, which include bug fixes,
will be made available on the app store to entitled subscribers.
The MapBoards (MB) toolbar icon
 will show and download indicator
 when an update
to your currently installed version is available.
when an update
to your currently installed version is available.
Installs can be downloaded from the Autodesk App Store. App Store
View version history here.
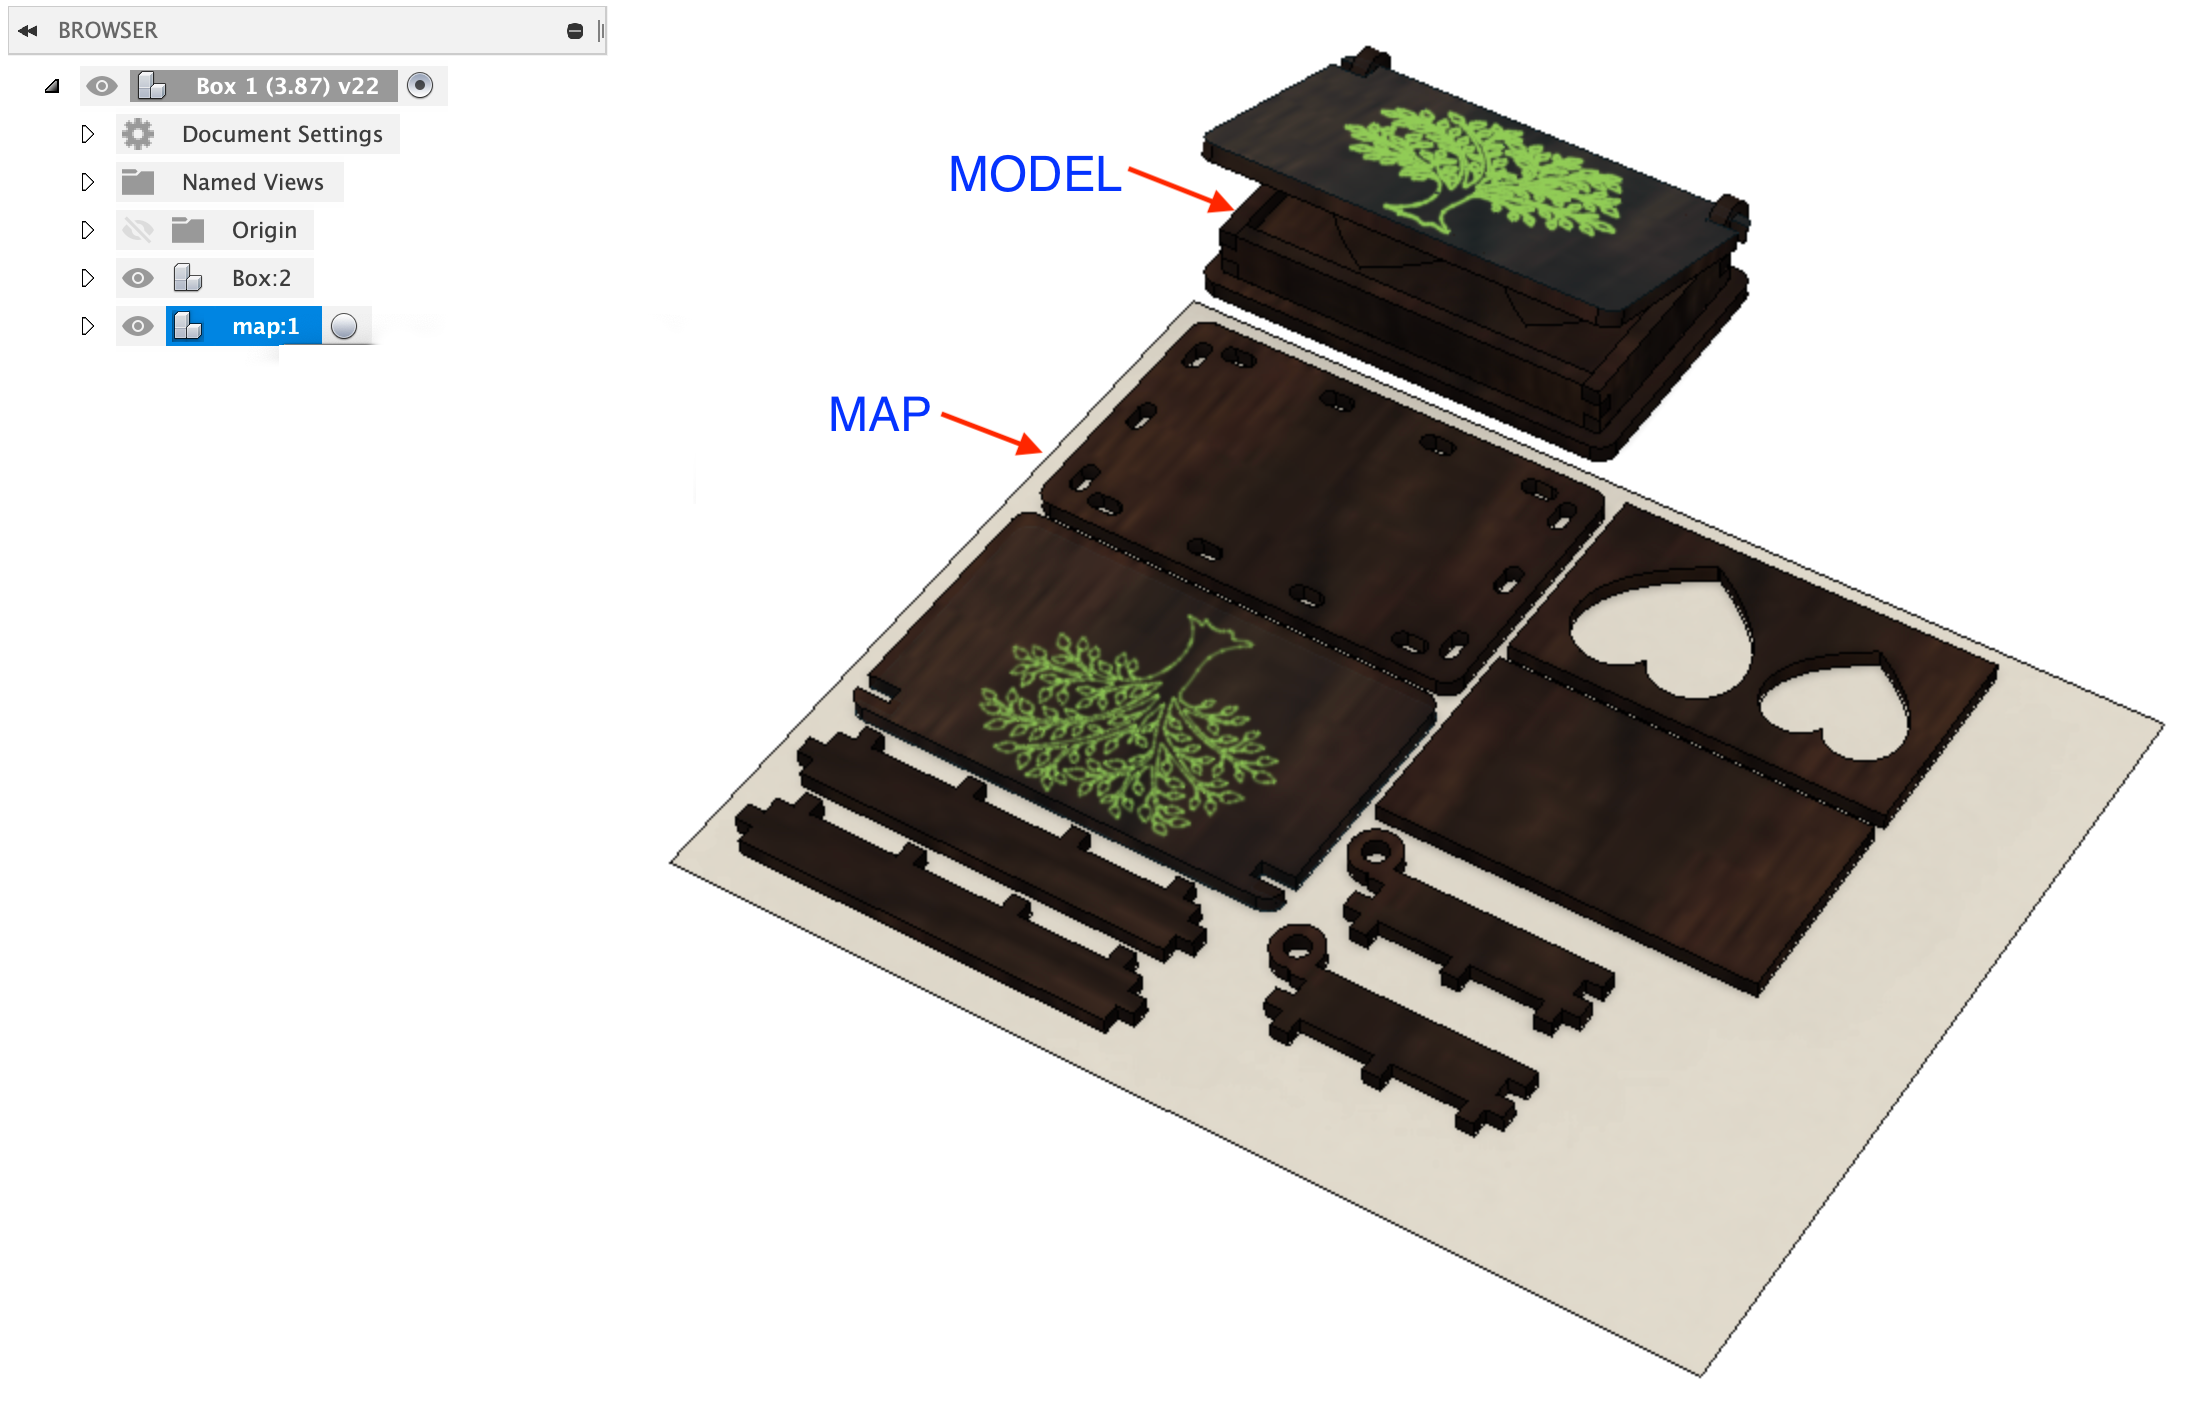
MapBoards (MB) will create a map which is the arrangement of component bodies in a model on one or more targeted boards. The arrangement is done with copies of the bodies leaving the model in tact. Placement of the bodies is based on a tight retangular bounding box for the bodies. This provides quick results and reasonable nesting.
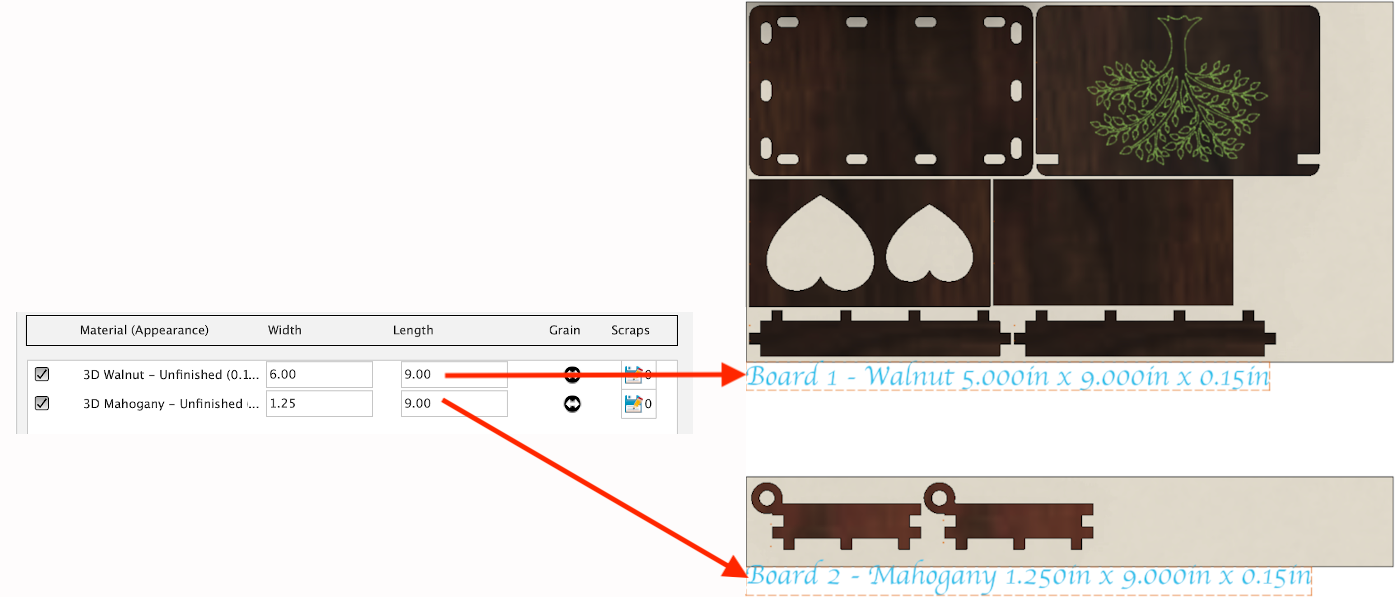
When MB starts the length, width, thickness and material type are determined for each component body in the model. The list of all material and thickness pairings are presented allow the targeted board dimensions to be specified. The initial default dimensions filled in will be a size large enough to fit one component, the largest component for each material type. You will needs to updated these dimensions before you run MB the first time on a model to match the size of the material you plan to use. The dimensions will persist and be included the next time you run MB on this model. Selecting Save as Default on the option tab will save the dimensions entered for each material type and thickness pairing and used as defaults by MB with other models. In this example the dimensions for materials Walnut and Mahogany are large enough to contain all components of their material type.
- Click Top on the view cube to align the top facing forward. This assumes the Map Orientation option matches the user preferences for modeling orientation.
- Click and drag the components within or between the boards
A flat pattern of the created map can be exported as a DXF file with a number of options including kerf thickness by selecting DXF File for Map Type in the options tab. The DXF file exported is layered as viewed from the top and will include perimeter, cutouts, and labels.
- Run MB selecting DXF File as a map type and include labels if desired
- Print the DXF file using the program eDrawings Viewer which is free and available for both Windows and Mac. It will resize the DXF image for convenient printing.
- Always ensure the saved assemblies you linked in have MB created maps removed. Clear the map by invoking MB and pressing Cancel.
- Name all component and do NOT use Fusion's automatically created component names, i.e. ComponentX. Instead provide your own unique names.
- Remember to save any updates you make to the assembly and refresh the model where linked.
There are a number of options available in the options tab. Trying the different arrangement types, the Can Rotate setting and boards dimensions will result in varied results. All options and dimensions will persist and be includes the next time you run MB on this model. You can save your option selections as default by pressing Save as Default in the Option tab.
View all available options here. Option Descriptions